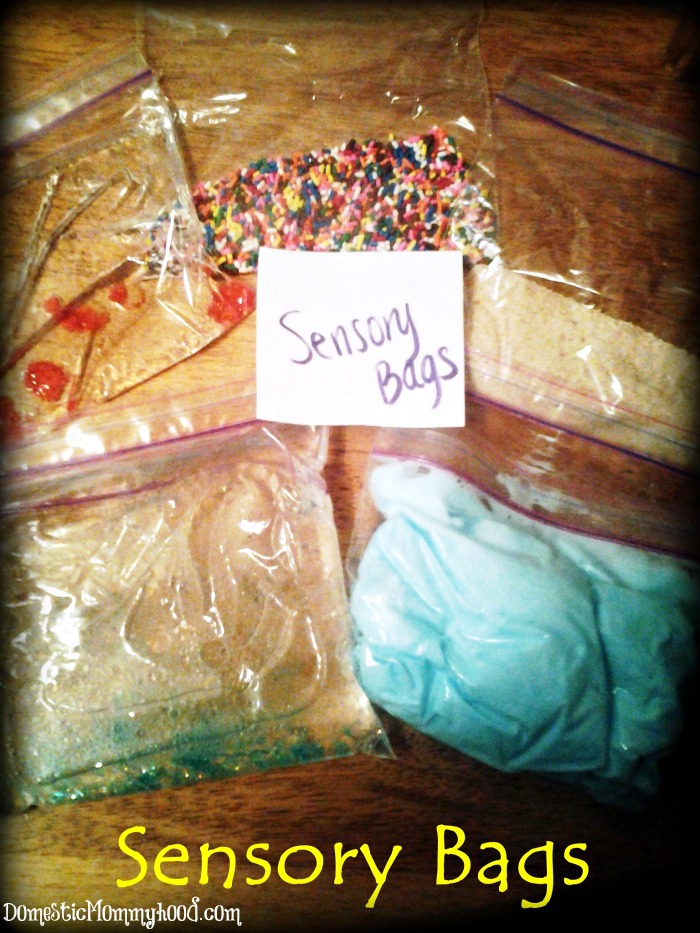
There is not always a reason to explain why a child has a sensory issue. It may be just something they deal with at a certain age or it’s an issue they’ll have long term. There may be nothing you can do to get your child used to certain textures. However, some children eventually adapt to unusual textures on their own. Since your child may have an actual issue with touching certain objects/textures, sensory bags may be ideal for you.
The ingredients for sensory bags are pretty simple. You will need:
-Ziploc baggies (enough to double up)
-Tacky Glue
-Glitter Glue
-Baby Oil
-Shaving Cream-
-Sprinkles
-Bread Crumbs
Bread Crumb Sensory Bag aka Sand
Have a child who’s not handling the beach very well? I came across something that feels just like sand that will help your child deal with the feel of sand a little better. This sensory bag is pretty simple. You just double up a Ziploc bag and pour the desired amount of bread crumbs in. You will want to leave a little bit of space, so your child can move the sand around and manipulate it with his or her fingers.
Sprinkles Sensory Bag aka Rocks/Gravel
Do you have a child who can’t stand to walk on gravel or rocks? Perhaps they struggle with touching dirt or gravel with their hands. Placing sprinkles in a doubled up baggie will help your child gain experience with touching various forms of gravel. The sprinkles are in the baggie, so your child still gets to feel the “gravel” but also has a safety net in place with the baggie there.
Shaving Cream Sensory Bag aka “It’s okay to get messy”
A lot of children who deal with sensory issues just have trouble wanting to get messy. Shaving cream is a safe bet when it’s in a plastic baggie. You might want to even triple bag this one because the shaving cream has the potential to leak through. Shaving cream is a positive way to introduce a way to get messy and learn at the same time. If your child struggles with the texture of shaving cream, anything sticky, or fluffy, then this is perfect for them. After your child gets comfortable with this sensory bag, it might be possible to introduce shaving cream outside of the bag.
Baby Oil & Glitter Glue Sensory Bag aka A Fun Feeling
There’s really no way to explain the feel of baby oil. But there may be a time when your child isn’t comfortable with the feel of baby oil, shampoo, cooking oil, the slime on spaghetti and so on. This baby oil feeling isn’t something that’s explainable, until you touch it. Place two baggies together and add about a ½ a cup of baby oil, ½ cup of water, and mix together. Add tacky glue to help the water and baby oil to get that ‘glass timer’ feel. You don’t want to add too much tacky glue or else everything will move incredible slow. After you’ve added the tacky glue, feel free to add as much glitter glue as you’d like. The look of this sensory bag will be like oil and water together. Your child can feel the “slimy” feeling without actually getting slimy.
Build Your Own Sensory Bag
The best part of this whole project is letting your child make their own sensory bag. If you want the “glass timer” feel to your sensory bags, then use water, tacky glue, glitter glue, plus whatever else you would like. You can add things like stickers or scrapbook supplies you have lying around. You can add as much or as little as you’d like. Let the kids take the reins on this one and see what fun they can come up with.
A child doesn’t need to struggle with a sensory issue to have fun with these baggies. As a part of growing up, children should be exposed to things like this to help them transition to activities throughout the day a lot easier. No one knows when they will come up on textures like sand, gravel, or spaghetti, but it’s nice to be prepared.


[…] Check out 5 more ways to make sensory bags here. […]